Plasterboard has become a viable option in interior and exterior renovations, especially when compared to traditional plaster. It is affordable, easier, and quicker to install, has favourable insulative properties like water, heat, and sound resistance, and the durability and strength that add to longevity and versatility.
Plasterboard can be used as a permanent solution to existing walls and ceilings or can serve the purpose of partition walls that can be easily removed. The level of customisation is rarely replicated by any other building material. While boards do come in standard sizes, they are easily cut to shape, jointed, finished, and ready for decoration or painting.
Mounting plasterboard to different types of walls or ceilings is relatively straightforward. Boards are available in different thicknesses and designs in terms of edge profiles, with tapered edge plasterboard the preferred choice for a smoother finish and easier jointing of boards across larger areas.
The choice of jointing tape and plasterboard joint filler will get varying levels of finish (such as level 3 for finer paint coats, and level 4 for the highest decorative standards). Choosing what’s right will give you a lasting result that also prevents cracks from forming in the long run.
Table of Contents
The Basics of Plasterboard Jointing
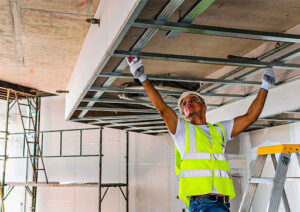
Before jointing, check that boards are evenly placed and that there are no protruding screws or nails. Good boarding is the prerequisite for good jointing and a flush finish throughout. Boards need to have a clean look with no damage. Minor damage can be repaired with filler, while boards that have more visible damage and dents should be replaced.
Once boards have been cleaned, dusted, and checked, jointing can commence. This involves jointing tape, jointing compounds, and the right application tools. Tape can be of two types. Basic paper jointing tape or scrim tape with adhesive. Both are tasked to reinforce the boards, but scrim tape is more versatile, especially when it comes to corners.
Jointing Compounds
Jointing compounds can be broadly divided into two major types – setting compounds and air-drying compounds. Each is used differently, and usually, a third finishing coat is required for a smooth finish to allow for decorating and painting.
In short, setting compounds are a type of plasterboard joint filler used for bedding tape between the joints and applying the base coat. They come in powder form and are mixed in water before being applied. This can be done with either hand or machine tools. The joints that these compounds produce are virtually crack resistant and generally stronger than air-drying compounds. These, on the other hand, are already pre-mixed, and usually all-purpose, meaning they can be used both for the basecoat and for the top coat.
Drying time differs in both. Setting compound generally sets within 90 minutes, so besides jointing, is also useful in quick repairs and where a filling is required. The air-drying compound usually takes 24 hours to fully dry, after which another coat can be applied.
Preparing Setting Compound Joint Fillers
Setting compounds are denser and heavier. This adds to overall strength, with less shrinking than air-drying compound but means there’s more work when sanding. Use clean water, a bucket, and mixing tools. The ratio of powder to water varies, but often this is two parts powder to one part water. This is mixed until free of lumps. Then it’s left to sit for 5 minutes, mixed again and then ready to apply.
Usually, you’ll find that brands selling complete lines of plasterboard filler will also have a range of tools for mixing, applying, and then sanding the filler to a smooth, workable finish. They also sell a range of tapes.
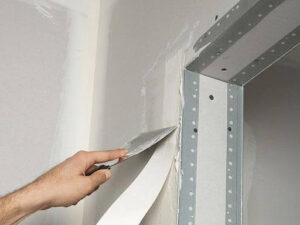
Application
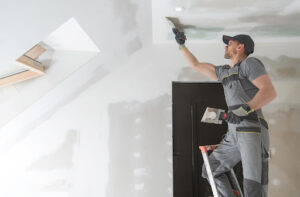
The setting compound is applied with hand tools, often a 4-inch setting knife. A general tip is to get 2 inches of the mixed compound on the knife, and this is applied to the joints.
When all joints are completely filled with compound, any excess is removed and you’re ready for taping. Unroll the tape halfway the length of the joint and press the tape firmly into the compound with the knife set at an angle of around 20-25 degrees. Ensure that there is enough compound under the tape for a firm bond.
Complete the rest of the joint by unrolling the tape to the needed length and repeating the process. Once all joints have been taped, another coat of plasterboard compound filler goes. leaving no visible tape.
Inside Corners
Inside corners need a little more finesse and patience. Use the 4-inch setting knife to apply a coat of setting compound at either edge, roughly 2-3 inches on both sides. When filled, place a cut piece of tape along the full length of the inner corner, creasing it in half lengthwise. Push the tape into the corner. Midway into the corner, smooth one side of tape, and repeat with the other. Add another coat of compound on top, and remove any buildup. Less dried material will make sanding quicker and easier.
External Corners
Corners connected with PVC or metal edge beads forego taping but will need slightly wider coats of the compound to fully permeate the bead holes. Cover both sides with the required number of coats until the beads completely disappear. Once you’ve completed this, the filler is left to dry overnight.
Sanding
Check that the plasterboard filler is completely dry and uniform in colour before sanding. Inside corners can be sanded with a sanding block, and other surfaces with a hand or power sander. Use medium (150-220) grit paper and apply even pressure, but avoid over-sanding.
Finishing Touches
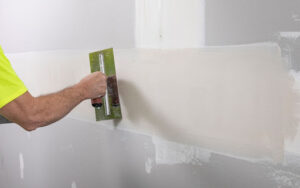
Once sanded down, the initial coating can then be treated with a finer finishing coat. This is applied in slightly wider strokes with a large knife, then left to dry for the recommended period and sanded down. Ensure that fasteners and beads are well hidden. The final touches can be adding a textured finish to the jointed plasterboard, using a texture compound and texturing knife or trowel. Alternatively, you can go straight onto painting or may wish to add wallpaper instead.